
This guide will run through the steps needed to install WordPress on a subdirectory (aka subfolder).
You will need access to your files and database. So if you are using cPanel, you can access this via File Manager and MySQL Databases.
No it will not. That particular WordPress installation will only run on the subdirectory it was installed on, and its child directories.
Here are some scenarios of WordPress installation in subdirectories and how it affects the other directories within the domain name.
Let's this take for example: I would like to install WordPress on a subdirectory named 'blog' on my domain, 'example.com'. So the WordPress installation will sit inside example.com/blog.
Scenario 1: Going to the parent domain name 'example.com' will not access the WordPress installation.
Scenario 2: Going to a sibling subdirectory such as 'example.com/portfolio' will also not access the WordPress installation.
Scenario 3: However going to a child subdirectory within example.com/blog such as 'example.com/blog/tutorials' will access the WordPress installation.
I hope this explains how WordPress works within subdirectories.
For most cases, it is not usual to install WordPress in a subdirectory, especially if the parent domain name is also running on WordPress.
There are however certain cases where this makes sense.
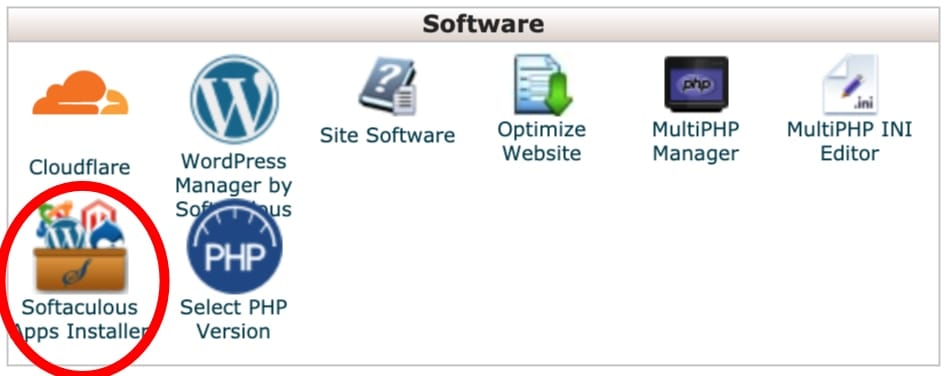
If you have used cPanel before, chances are that you have also used the Softaculous installer for their one-click WordPress install. However, Softaculous does not have the option for you to install on a subdirectory, so you will need to proceed on with a manual installation of WordPress.
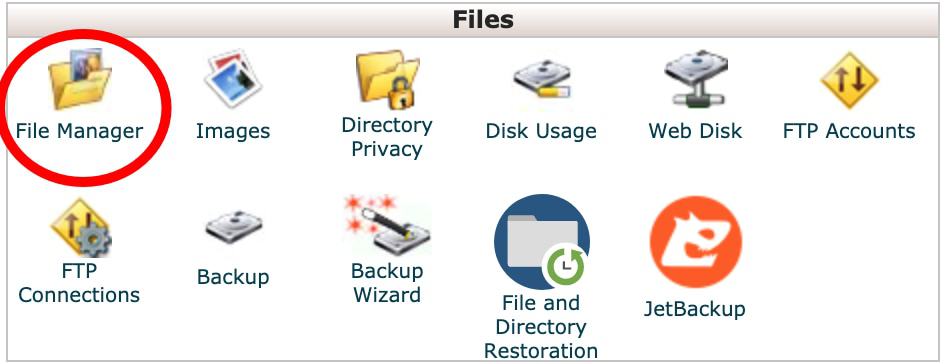
Within your cPanel, go to the File Manager and find the root directory that your main website is on. This is usually inside the /public_html directory. If you are running WordPress, you should be able to see the familiar WordPress folders such as wp-admin, wp-content and wp-includes.
If you are using FTP, use your FTP client to navigate around the directories instead.
Once you are in the correct directory, go ahead and download the latest WordPress installation in a zip format from WordPress.org, and upload it to the new directory that you have created. Afterwhich, you may go ahead and unzip the files, then delete the initial zip file as we are done with that.
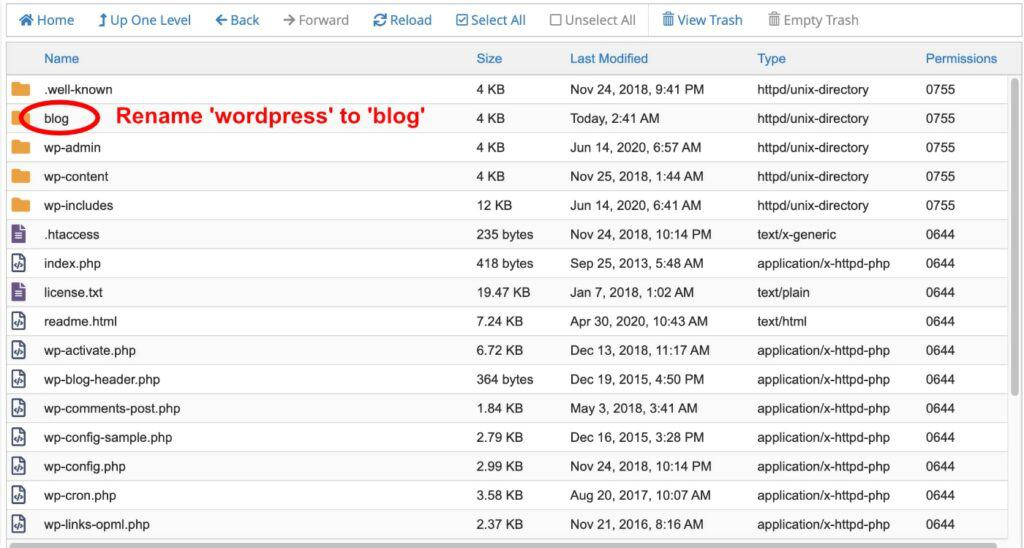
You will realised that your new files are in a folder called 'wordpress'. You will want to rename this folder according to how you want your site address to be.
So if you want your new WordPress installation to be on example.com/blog, then you should rename the folder to 'blog'.
Within your cPanel, go to your MySQL Databases.

Next, add a new database and name it to whatever you like. Be sure to take note of the database name as we will be needing it later.

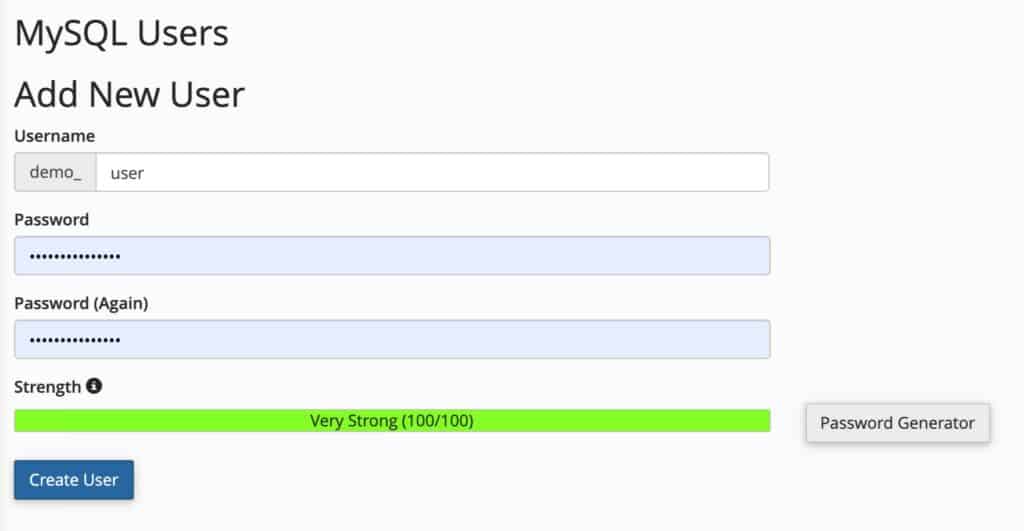
Then, add a new user. Be sure to take note of the username and password as we will also be needing them later.
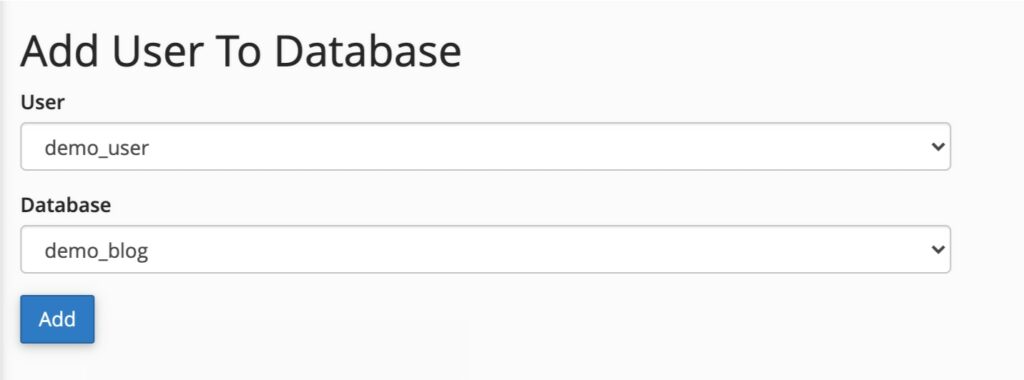
Lastly, we will need to link up the new user to the new database, as they are not linked up by default.
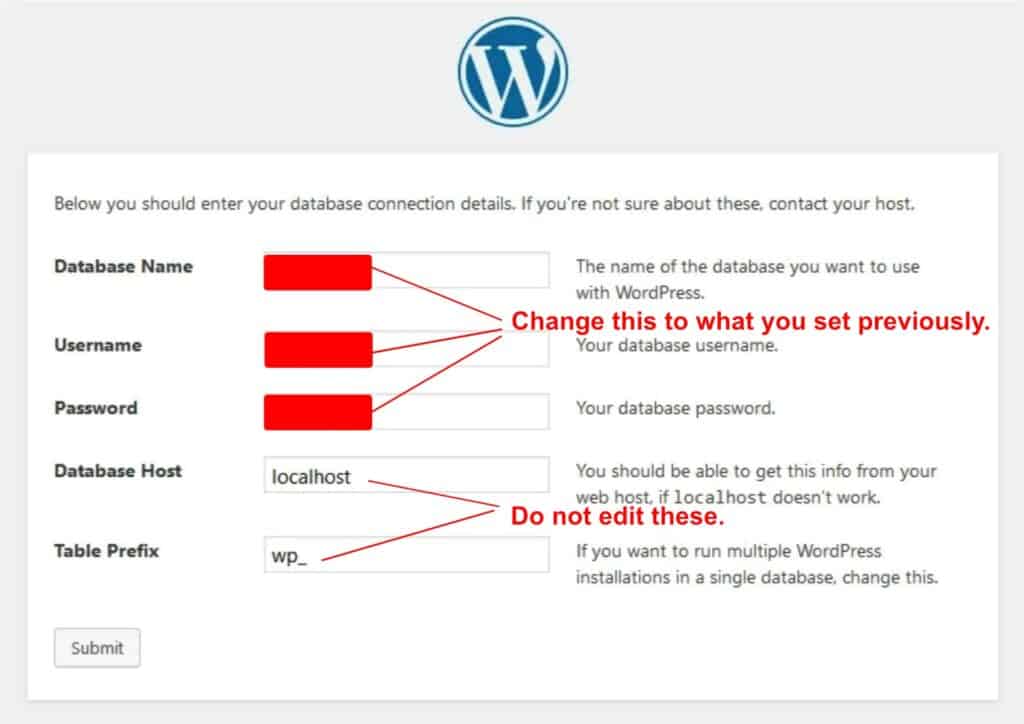
To install WordPress, just go to your site address where the new WordPress is at. For my example, this will be example.com/blog. On the first load, you should be able to see the WordPress installation screen. Proceed on until you come across the following page where you are asked to fill in the Database Name, Username and Password. (Leave the Database Host and Table Prefix as it is)
Once that is done, you should have another page that requires you to input your Site Title, Username, Password and so on, that is the usual fields required for a WordPress installation. Go ahead and set that as you wish.
WordPress should have been able to detect that you have installed on a subdirectory, and created the correct rules within the .htaccess file. Just to make sure, open the .htaccess file and ensure you see the following:
<IfModule mod_rewrite.c>
RewriteEngine On
RewriteBase /blog/
RewriteRule ^index\.php$ - [L]
RewriteCond %{REQUEST_FILENAME} !-f
RewriteCond %{REQUEST_FILENAME} !-d
RewriteRule . /blog/index.php [L]
</IfModule>
Remember to change the /blog to the name of your subdirectory.
The code above ensures that your permalinks are correctly routed according to your new WordPress installation root directory.
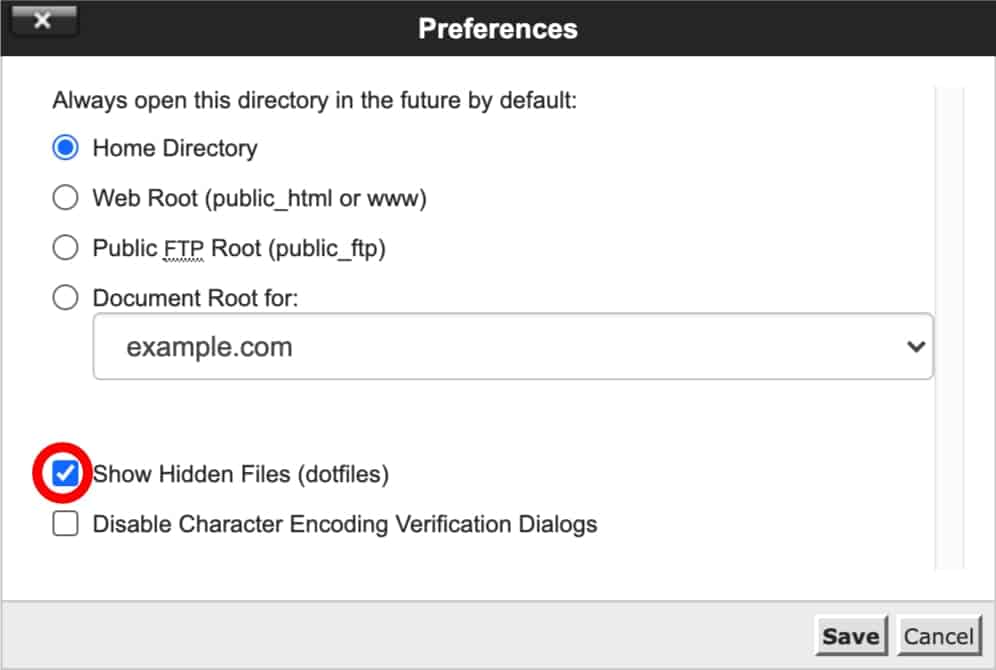
If you are not able to find your .htaccess file, make sure to click on the settings button on the top right of the page and check 'Show Hidden Files'
If you have followed this guide carefully, you should have managed to install WordPress on the new directory.
If you encounter issues along the way, please feel free to write them in the comments below and I will do my best to help.