

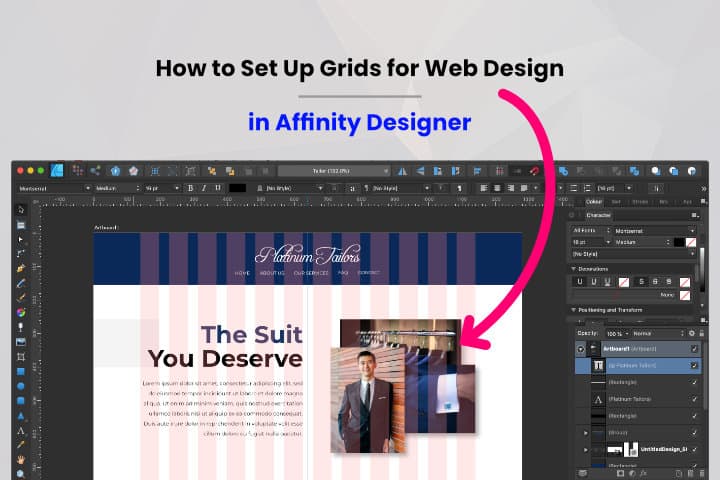
Here's how you can setup layout grids, 960 grids, 12-column grids, or any variation that you prefer for web design on Affinity Designer.
Affinity designer is one of my favourite and go-to tools for web design, especially for static web mockups. Once you get the hang of how to use all their available tools, you can go about with your mockups really efficiently.
Affinity has the ability to easily set up 12-column grids, or any other setups your prefer, with snapping capabilities. This helps you to intuitively keep your designs and layouts consistent throughout the page.
There are 2 obvious ways to go about creating the layout grid.
The first way is using the Grids and Axis Manager, the other way is using the Guide Manager.
For the purpose of web design, I have chosen to use the Guide Manager over the Grid and Axis Manager for these 3 big reasons:
The Grid and Axis Manager is definitely a handy tool when it come to many other workflows, but the Guide Manager is by far the better choice for designing web page layouts.
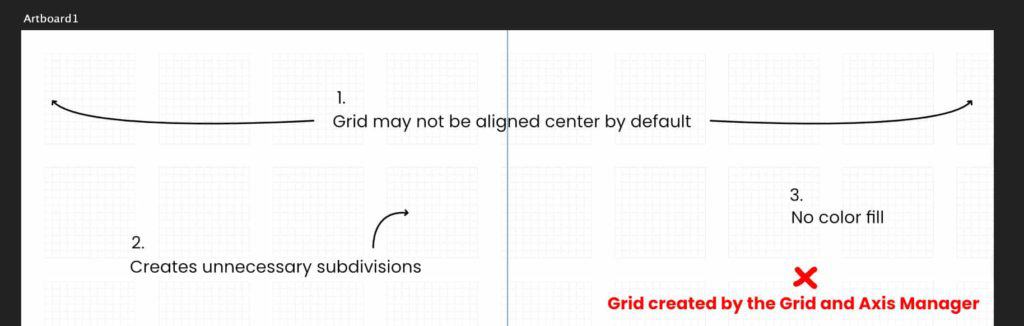
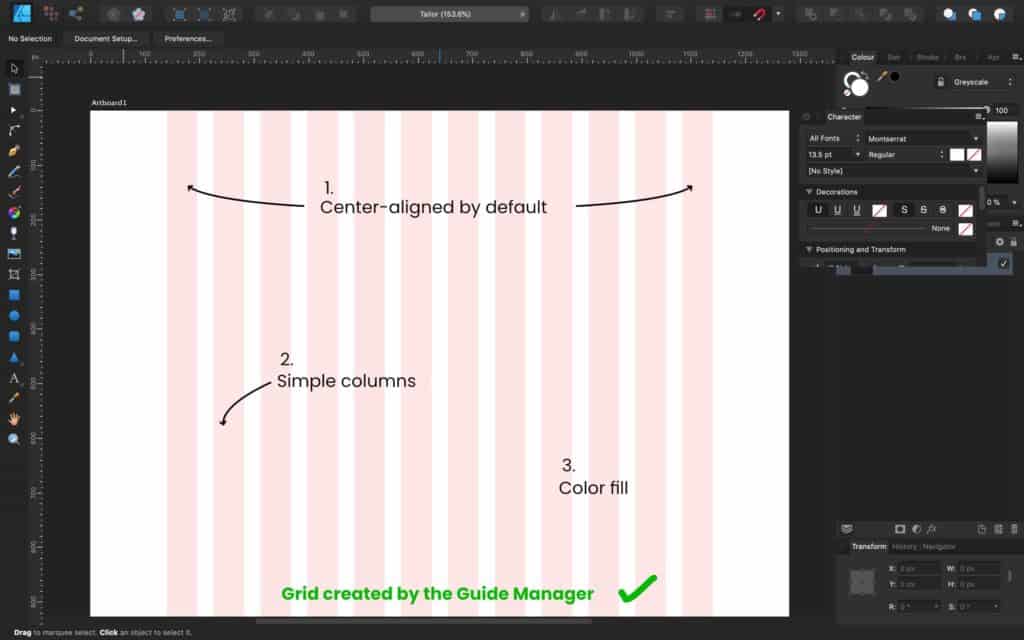
What we are working with is specifically called column guides.

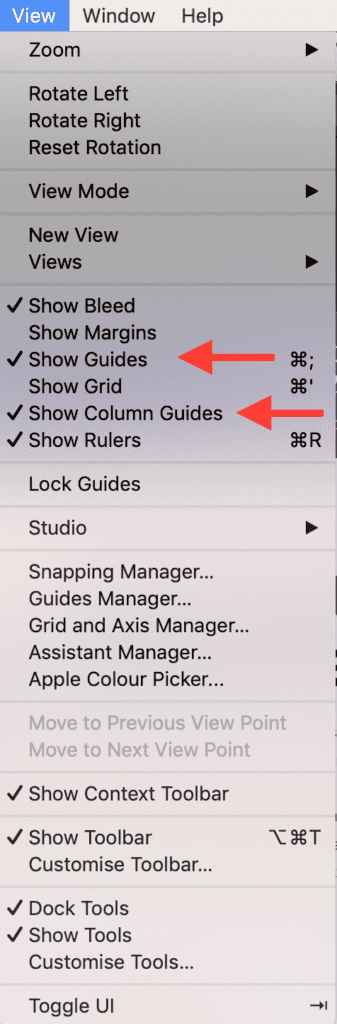
This can be accessed by going to your Affinity Designer toolbar on the top and clicking on view, followed by Guides Manager under the dropdown.
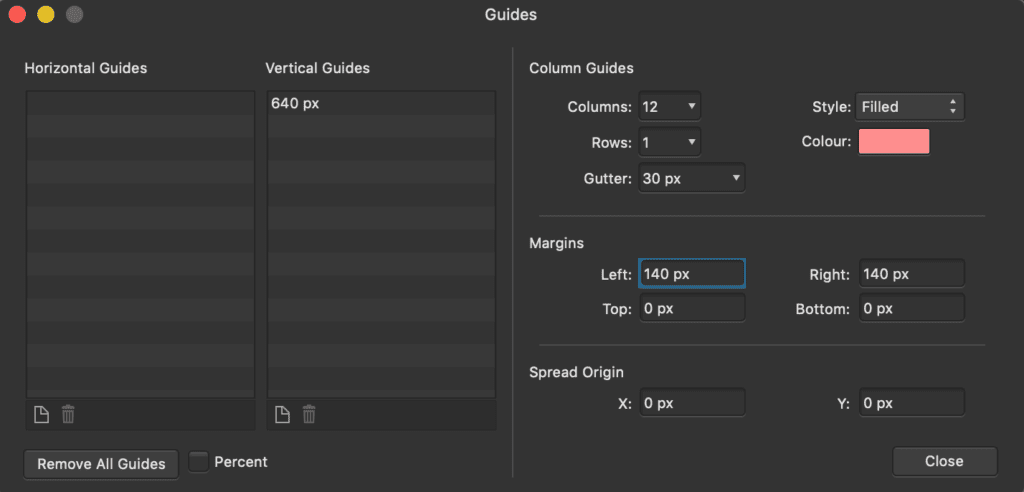
Your Guide Manager window will pop up, and you will see Column Guides on the right half. You will just have to fill in the settings according to your needs.
For this example, I will be working a a 1280px wide canvas. I want to set up a 12-column grid, with 30px spacing between each grid, and 140px of margins on my left and right. A very typical setup I use. And here are the steps:
Your column grid will then be created. It may not show yet because we have not toggle it on, but for now we can go ahead and close the Guide Manager. This is just a one-time setup for your project, meaning you can adjust the length of your artboard, and the grid will just go on continuously with your artboard.
For good measure, you could also create a vertical guide that will be placed in the center of your canvas. I do this because center-aligning is common in web design, so it’s faster to have a visual marker right there when I need it.
Go to your toolbar and click on View.
Under the dropdown, click to enable/disable Show Column Guides. This will show or hide your main grid. Toggle it on whenever you are working on your layout, and off when you want to take a look at your design by itself.
Under the dropdown, click to enable/disable Show Guides. This will toggle a blue vertical line that will run in the middle of your canvas.
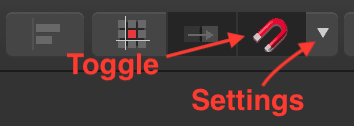
While creating and arranging your layouts, snapping should be turned on and configured properly to make sure your work is aligned pixel-perfectly to your grid.
Toggling the snapping can be done by clicking on the magnet icon somewhere at the top of your screen.
But you should configure it first by clicking on the dropdown button on the right of the icon, then tick the checkbox that says “Only snap to visible objects” and “Snap to guides”. Alternatively, you could also use the “Page layouts” preset, which will work well for snapping onto the grids that we have created.
Get yourself a copy Affinity Designer, or their entire suite of professional and versatile designing tools, available for macOS, Windows and iPad (for certain programs only), here at : https://affinity.serif.com/en-gb/
